The Item Finder provides a way to build and maintain item based queries, which can then be used to find a given item. Defining a set of restrictions that step-by-step limit the number of items matching a query, will make it easier for the user to find the correct item.
In the Item Finder Setup page, the user defines a set of restrictions that will limit the items for final selection. Each question can either target fields from the item table or be targeted at variants, special groups, or item attributes.
The Item Finder can be implemented to every process where finding an item is needed, for example on the POS.
This module takes advantage of the POS Lookup function. See POS Lookup Setup for more information.
Setup
- Open the Item Finder Setup List, select a setup from the list, and click the Manage - Edit action to open the Item Finder Setup.
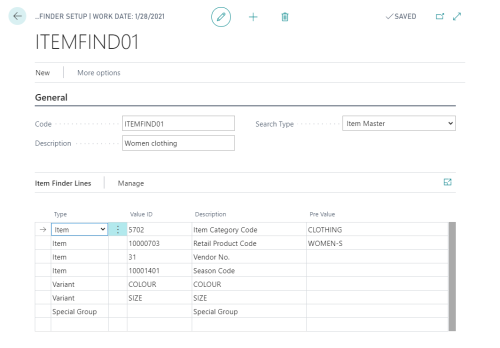
This is where the queries are created. For each query, restrictions are set to make it possible for the user to narrow the query result to a few or a single item.
Restrictions can be of the types Item, Variant, Special Group, and Attribute. If a restriction is set on a field in the Item table, the result set is narrowed to the selected content. Variants are based on its dimensions and values. Special groups narrow the result to a selected special group and attributes to an attribute option value.
In the following query example, a list of restrictions is made to assist the user in finding a woman’s dress. The setup is based on a given variant framework (WOMEN), a preset value of item category (CLOTHING), and Product Group (WOMEN-S). Other fields are open for user input when the query is run.
The setup uses data from the POS Lookup function, and when a query is run it uses information from it, too. The Table Lookup module is used to define the default fields to use when working with a given table. Refer to the POS Lookup Setup for more information.
Test Find action
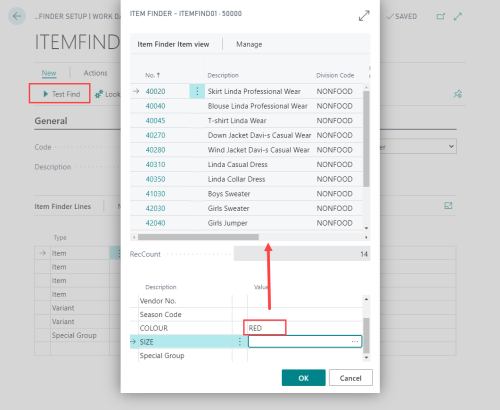
After defining an Item Finder query, it can be tested by running a Test Find.
To use the Test Find action with Item Finder in BackOffice:
- Open the Item Finder Setup List.
- Locate the query you want to work with and edit it.
- Click Actions - Test Find.
- Enter your restriction. In this example, the restriction COLOUR = RED is added.
- Activate the cursor in another field.
- Now note, the upper area is filtered based on what has been selected.
- This result includes all items that have the COLOUR Variant Red.
Note: When creating a restriction on a field from the Item table, the field must be in an active key for the table. A Lookup on the Value ID field in a restriction of the type Item will only display fields from active keys.
Item Finder on the POS
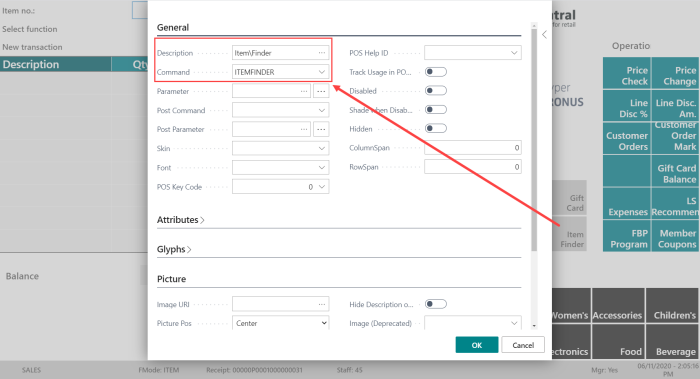
To add the Item Finder functionality to the POS, simply add/modify a menu button on the Sales Menu (or another Menu used in Sales State) with the POS command ITEMFINDER.
If no parameter is defined on the button, the POS Item Finder will start with a list of Item Finder Setups from which the user can select; otherwise, the POS Item Finder will open using the given Item Finder Setup of the button.
Example:
- Item Finder in POS.
- Be in POS and select the button Item Finder.
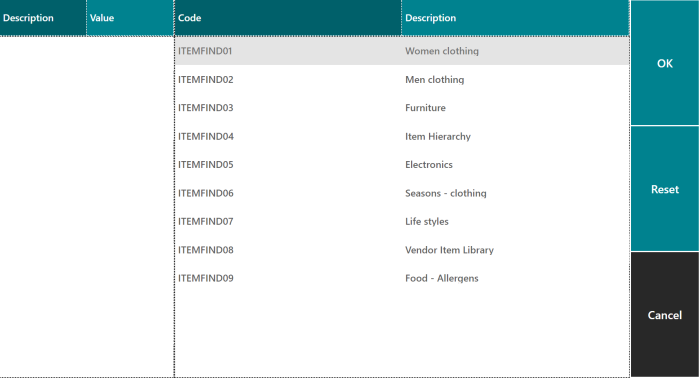
- Here you select one of the Item Finder setups you want to use for your filtering .
- Select, for example, line ITEMFIND02 Men Clothing:
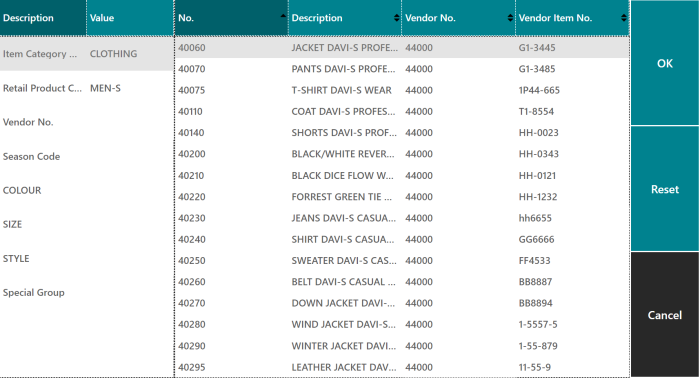
- Now you want to limit the item list to items from the Special Group DAVI-LINE.
- Click the Special Goup setup in the table on the left.
- The Data Table on the right switches its values to the available Special Product Group codes with the Men clothing.
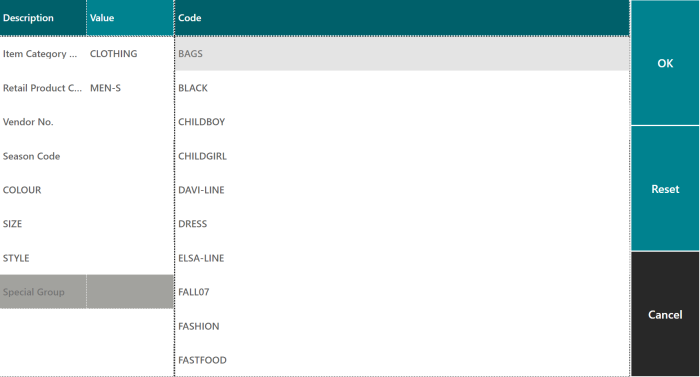
- Select the DAVI-LINE code.
- The values will switch back to the Item List.
- The new criteria will be shown in the Setup Table on the left.
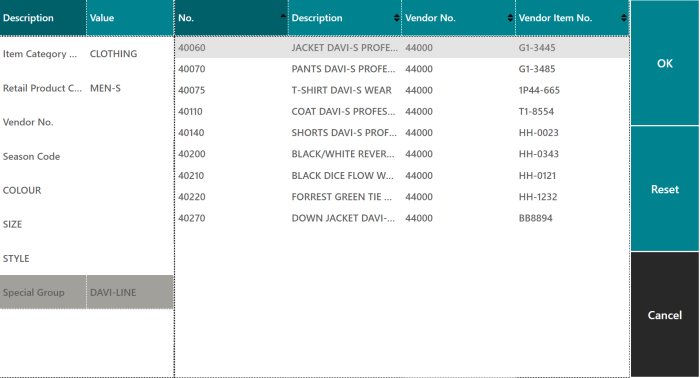
- Select one of the items, and press OK to add that item to the sale.
- Note: The Reset button will reset your last filtering, go back one action.