There are two ways to import items into Retail Items.
Things to prepare before importing data into Retail Items
The process to import the file including list of items into the system
After the import: What needs to be done?
The first option is to use Configuration Packages as Business Central has, the other option is to use the import files options via Vendors. This topic explains the Item Import via Vendors option.
Things to prepare before importing data into Retail Items
- Item import setup
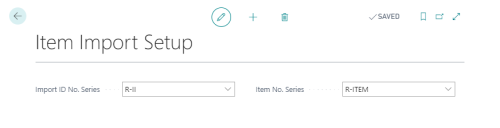
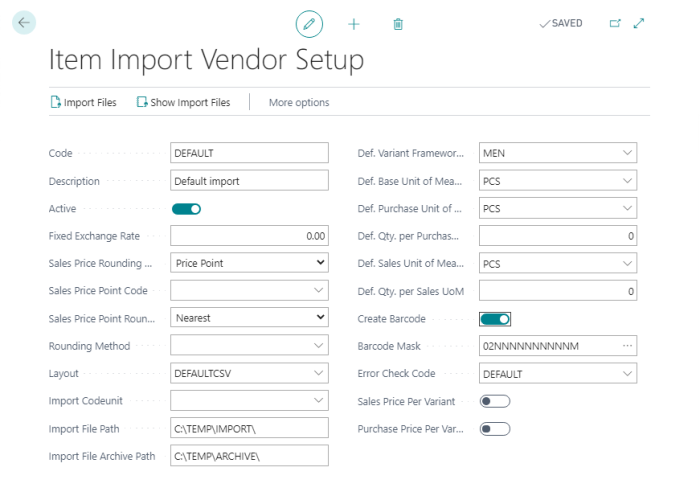
First you need to create number series used by the import for Import ID No Series and Item No (in the case you want the system to create Item No. for you).
-
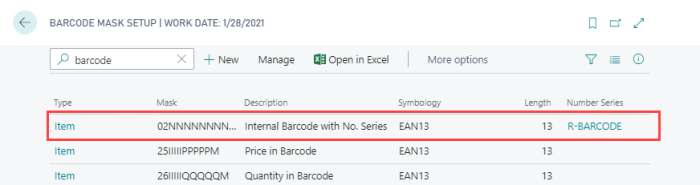
Barcode mask setup
If you want the system to generate bar codes, you must setup a number series and assign it to a bar code mask.
-
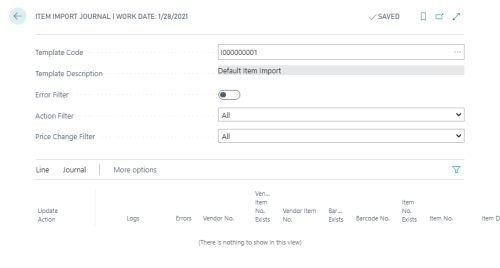
Item Import Journal
On the Item Import Journal page, create the necessary Journal Templates, used later in the process to validate and update imported Item data.
-
Item Import Layout List
Create a layout for each type of file that you need to import, see example below:
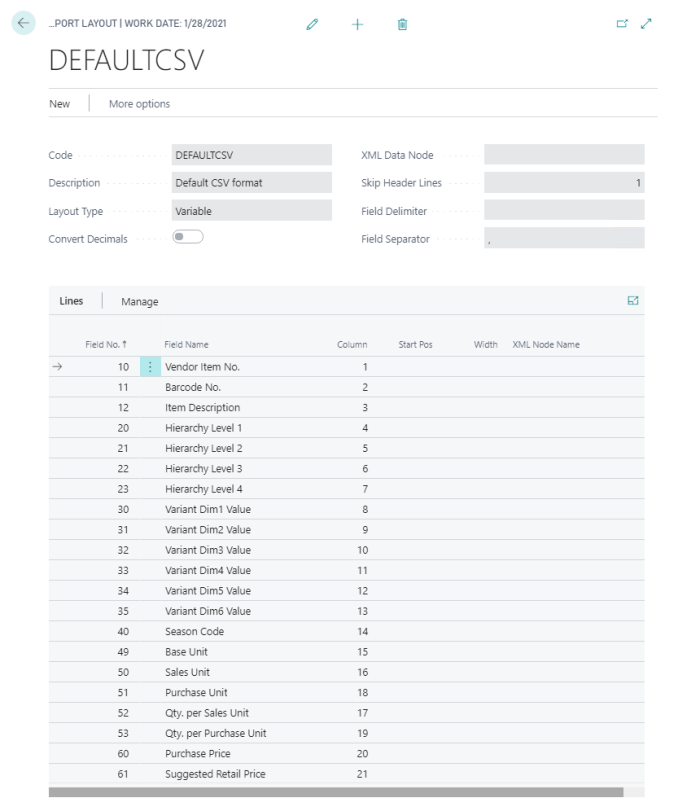
Note: Layout type has a few options. For CSV format use value Variable.
Note: If your import file has a header line, use value 1 in the Skip Header Lines field .
Note: Field Separator for CSV format: put in the value that is used in the file.
-
Retail Vendor - setup options
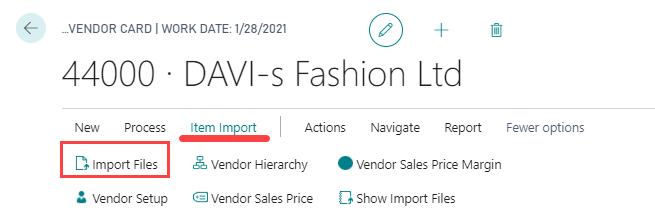
- Open the Retail Vendor Card for the vendor you want to import the items for.
- Click the Item Import action to see relevant setup actions for this process.

- Make sure you are active for the vendor card you want to import items for, and finish the setup options for that vendor.
-
Vendor Setup - create and define the Item Import Vendor Setup.
-
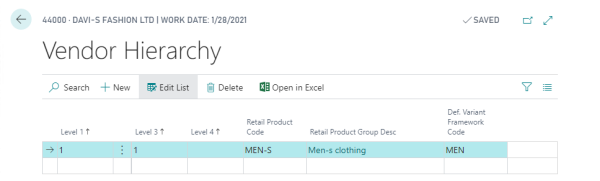
Vendor Hierarchy page. You can define the Vendor Hierarchy and how it converts into LS Central item hierarchy.
- Vendor Sales Price page. You can define how vendor suggested retail price is converted into LS Central sales price.
- Vendor Sales Price Margin page. You can define the factors to use when calculating LS Central sales price based on vendor suggested retail price or vendor purchase price.
Tip: LS Sales price decided. The method used to calculate the sales price is like this:
- Check the Vendor Sales Price.
- Check the Vendor Sales Price Margin using the Suggested Retail Price.
- Check the Vendor Suggested Retail Price.
- Check the Vendor Sales Price margin using then Vendor Purchase Price.
The process to import the file including list of items into the system
- Prepare your CSV file, make sure that the fields in the file fit the Item Import Layout as explained before.
- Copy your CSV file to the folder that is set in the Item Import Vendor Setup. Example: C:\TEMP\IMPORT.
The name of the file can be of your choice, for example item.csv. - To import the file, use action Import Files under Item Import on the Retail Vendor Card:
- To check if the files have been imported, you can do two things:
- When succeeded the file does not exists any more in the import folder.
- Use the Show Import Files action to check if a new line exists for your import.
The process stops with the first step to be fulfilled. The only step with direct conversion is the first step (check the Vendor Sales Price), other steps have to be rounded according to the rounding method of the vendor setup after calculation, that is either by price point or by basic rounding methods.
The next step is to validate the basic data and also to check the data base on the error check setup. If journal lines pass with out any errors, they are ready to be used for update of the item master.
After the import: What needs to be done?
After the files have been successfully imported, the data need to be retrieved, validated, and then finally created:
-
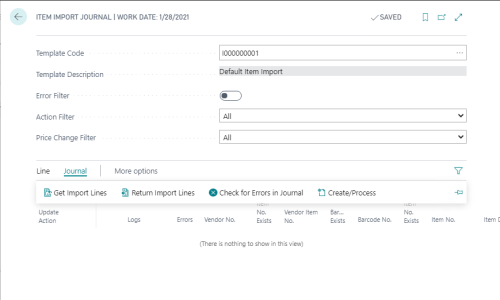
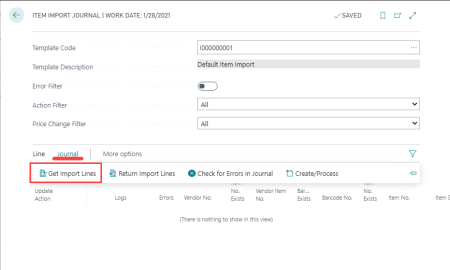
Open Item Import Journal for your Template Code:
-
Run the Get Import Lines action under Journal:
-
The data is now in the journal and you can check and modify the data if you want.
Note: you can use option Check for Errors for your Journal.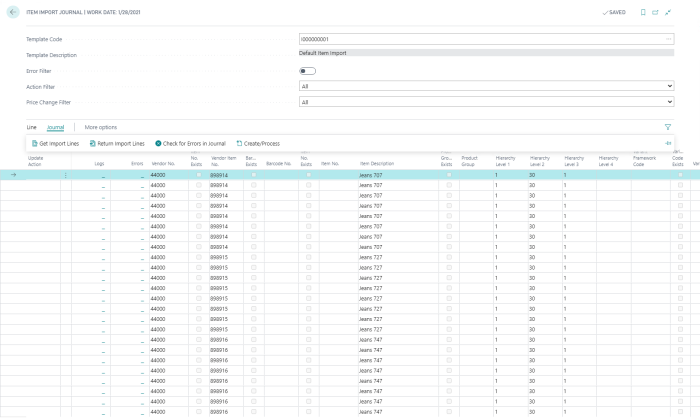
- To create and/or update the item master with the data from the Item Import Journal:
- Run Create/Process. If there are errors, you will be alerted and you can see error messages for each line.
Processed vendor data can be seen in Item Import Register.