To create a dining area plan
- Click Plan on the Home action menu. Today's date appears as Show from Date and Show up to Date is a month into the future.
- Click the Insert Plan where Missing action.
The program uses the existing dining area plan templates to create a dining area plan for each day in the period. It picks the first template with the highest priority that is valid for the day. If there is no template valid for the day, the dining area is closed that day.
Note: The program creates dining area plans automatically when you run the POS for a dining area with dining area plan templates set up.
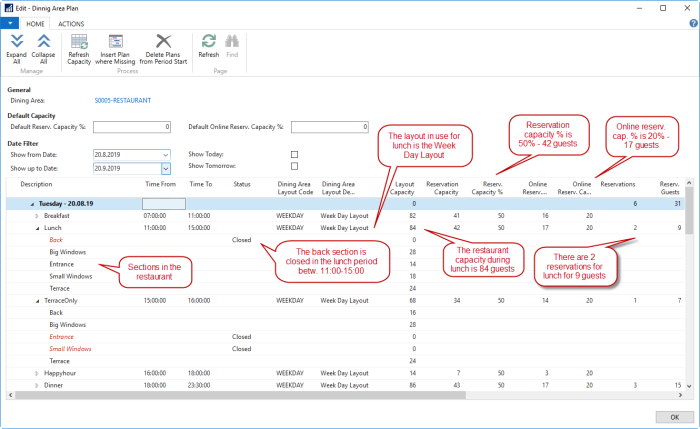
To adjust the dining area plan
- You can open and close a period or a section by editing the Status field.
- You can select a different layout in the Dining Area Layout Code field.
- You can adjust the Reservation Capacity, Reserv. Capacity %, Online Reserv. Capacity, and Online Reserv. Cap. %fields for each period.
- You can apply a default reservation capacity % to all the dining area plans in the dining area by editing the Default Reserv. Capacity % field.
- You can apply a default online reservation capacity % to all the dining area plans in the dining area by editing the Default Online Reserv. Cap. % field.
- After closing or opening a period or day plan, you need to press Refresh Capacity to let the program recalculate the reservation capacity and online reservation capacity.
See also
Setting Up Dining Area Plan Templates